Philips Hue bridge provides a great way to integrate the hue bulbs into our smart homes. Especially, when the bridge is connected to the internet it brings a new way to control and organize the home lighting. The bridge can control up to 50 bulbs and/or accessories. For me, Philips Hue is a must-have in a smart home ecosystem. So, how to connect Hue bridge to WIFI?
As you probably know, the hue bridge acts as a translator between the ZigBee hue lights and the HomeKit or control connection. It’s simply to say the hue bridge communicates to the bulbs through ZigBee technology and to the Hue app (control device) via the WIFI network.
In this guide article, I will walk you through the setup process, how to connect the hue hub to WIFI, and how to add lights to your app. Sit tight, and follow the article to learn more.
How Do I Connect My Hue Bridge to A New WIFI?
You can connect the Hue Bridge to Wi-Fi yourself without spending extra bucks or having an expert do it. It’s a pretty straightforward process to connect. That said, here is a step-by-step guide on how to connect your hue bridge to your network.
How To Connect Hue Bridge To WIFI
If you intend to connect and control your bulbs, it would be wise to connect the light adapters. So, let’s begin by installing the bulbs:
STEP1: Connect Your Bulbs and The Hue Bridge
- Install the Philips bulbs in your desired fixture. To enable easy pairing up with the bridge, it’s better to plug the lights and the bridge in at around the same time.
- After installing, turn on the switch or switches to your bulbs. If you correctly plug in the bulbs and the bulbs are powered, they automatically turn on indicating there are ready to pair.
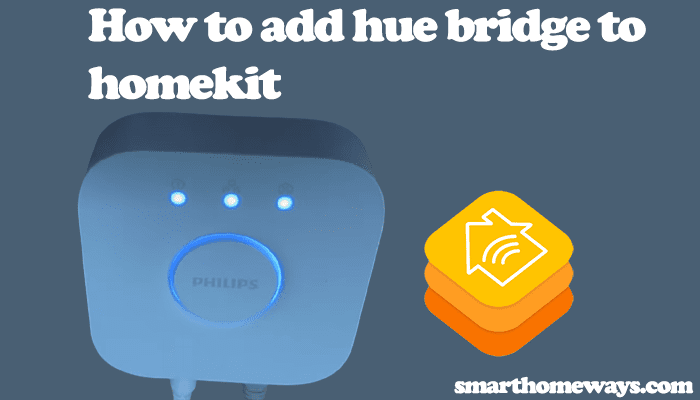
- Now, let’s turn to the hue bridge; use the power cord to connect your bridge to a functioning outlet, the top-left light glows when it’s correctly plugged in. This setup should be close to your router.
- Connect the hue bridge to the router using the provided ethernet cable. Insert one end of the cable into a router port and the other end into the hue bridge. Observe the middle and top-right indicator lights, if the connection is successful and your router has internet, all the three lights on top should glow.
If the setup is complete and successful, the four lights on your bridge glow. The power, network, internet, and link lights show connectivity. Now your bridge is ready to set up with devices. It’s time to download the Hue app.
STEP2: Download the Hue App
The Hue app can be found in the App Store and Google Play store. Here is how to download the app:
- Launch your respective store on your phone.
- On the search bar, type “Phillips Hue app”. Ensure that you get the original app and not one of those third-party apps.
- Once the app appears on the list, click on it and proceed to install it on your device. Give your device a few minutes to download and install the app.
Now that you have successfully installed the app, let’s connect the hue lights to the app for easy control and management.
STEP3: Connecting the Hue App
- Open the Hue app on your phone
- Click on the setup button. The app searches for a bridge in your network.
- When prompted, push the “Link Button” to connect your app and the Hue bridge.
- If an update is available, you will be prompted to download and upgrade your bridge.
- Click on “Done” to finish up the setup process
- For iOS users, you can proceed and “Pair Bridge”. To begin the home setup process. Scan the code on the bottom of the bridge or manually enter the code to connect your home app to the bridge.
Next, we proceed to add the lights.
STEP4: Adding Hue Lights
The hue app can control up to 50 lights and/or accessories. These are the steps to add new lights to the app;
- Under the Settings > Light setup, click on the “+” symbol
- Then click Search. Wait for your app to automatically search for available lights. If none is found, you can manually add your light by filling in the serial number. When you tap your found light in the app, it blinks.
- Tap on the “i” icon to rename your light or leave it as is. You repeat the process to add more lights.
After adding your lights, you can proceed to room set up.
STEP5: Setting Up Your Rooms
- Tap on “Create Room”
- Enter your desired room name. For example, a “Bedroom” or “Living room” is a name that you can use to identify the light location.
- Select your “Room Type”. Choose the kind of room from the list provided.
- Add the bulbs to be associated with your chosen room. Use the checkbox next to the light to add or remove light to the room.
- To add more rooms, click on the “New” button at the top left.
- When you are done with your setup, click on the Save button on the top-right.
- To finish up your setup, click the “Let’s Go” button at the bottom of your app
Now, you have successfully set up your hue bridge, connected it to the router, and added lights to the Hue app. You can now control your lights via the Hue app. You can even go a step further to add voice control through Apple’s HomeKit.
Check out; How to connect a hue bridge without an ethernet cable.
Can I Connect Hue Bridge Wirelessly?
The Hue bridge is primarily designed to be connected to your router through an ethernet cable. However, you can connect your bridge wireless by buying a secondary router and operating it in bridge mode or by tweaking the hidden Wi-Fi mode in the hue bridge hardware.
Importantly, note that tweaking your hue bridge hardware voids your warranty. It also needs one to have some programming background to run the router configuration commands.
Using a secondary router in bridge mode is a more feasible solution if aren’t familiar with programming. Only that it involves spending some extra bucks. To achieve this, buy a router that can operate in bridge mode, set it up at your desired location and connect it to your network as a bridge. Next, connect your Hue bridge to power and connect it to your bridge router via the ethernet cable.
Why Is My Philips Hue Bridge Not Connecting?
Your Hue Bridge won’t connect to the internet if you plug it into a secondary router in your network. Ensure that the bridge is connected to your main router and that you don’t have any VPN running on your mobile device.
Check your ethernet cable and ensure that it’s properly plugged in and/or if it’s faulty.
How Do I Reset My Hue Bridge Wi-Fi?
To reset your Hue Bridge Wi-Fi, disconnect the ethernet cable, and turn the bridge upside-down, you will need a paper clip to press the “Factory reset button” for about 5 – 10 seconds. Your router reboots and clears all data, you can begin the setup process.
Note: If you are interested in a network reset without clearing your bridge configurations, unplug your bridge’s ethernet cable from the router, switch off the devices (bridge and router) and wait for about 10 -20 seconds. Turn them back on and connect the ethernet cable back.
This refreshes your network connection.
Final Thoughts
The Philips Hue livens you’re your smart home by providing a smart lighting ecosystem. When you connect your hue bridge to Wi-Fi, it avails more features to manage and control your lighting system. You can even go further and integrate Apple’s HomeKit for a more centralized control system and to use Siri commands.
The hue bridge acts as the brain of the hue light ecosystem. Therefore, it’s an integral part of the lighting system allowing you to control, manage, and organize your lights.


